简介 Link to heading
基本参照 XTLS Vision 安装指南,系统为 Debian 12。
申请 SSL 证书 Link to heading
首先使用 acme 申请 SSL 证书,依次执行以下命令:
apt install -y socat
curl https://get.acme.sh | sh # 安装 acme
source ~/.bashrc

bash
acme.sh --upgrade --auto-upgrade # 设置 acme 自动更新

acme.sh --set-default-ca --server letsencrypt # 将默认 CA 更改为 Let's Encrypt

# 这里使用 standalone 模式为 chika.example.com 申请 ECC 证书,请将 chika.example.com 修改为自己的 VPS 对应的域名,例如 xxx.zwyyy456.tech, 下同
acme.sh --issue -d chika.example.com --standalone --keylength ec-256

# 将 chika.example.com 的证书安装到 /etc/ssl/private 目录
acme.sh --install-cert -d chika.example.com --ecc --fullchain-file /etc/ssl/private/fullchain.cer --key-file /etc/ssl/private/private.key

# 设置证书权限以配合 Xray 服务端配置文件
chown -R nobody:nogroup /etc/ssl/private

# 强制更新证书
acme.sh --renew -d chika.example.com --force --ecc
安装 Xray 与 Nginx Link to heading
执行以下命令:
bash -c "$(curl -L https://github.com/XTLS/Xray-install/raw/main/install-release.sh)" @ install --beta

apt install -y gnupg2 ca-certificates lsb-release debian-archive-keyring && curl https://nginx.org/keys/nginx_signing.key | gpg --dearmor > /usr/share/keyrings/nginx-archive-keyring.gpg && echo "deb [signed-by=/usr/share/keyrings/nginx-archive-keyring.gpg] http://nginx.org/packages/mainline/debian `lsb_release -cs` nginx" > /etc/apt/sources.list.d/nginx.list && echo -e "Package: *\nPin: origin nginx.org\nPin: release o=nginx\nPin-Priority: 900\n" > /etc/apt/preferences.d/99nginx && apt update -y && apt install -y nginx && mkdir -p /etc/systemd/system/nginx.service.d && echo -e "[Service]\nExecStartPost=/bin/sleep 0.1" > /etc/systemd/system/nginx.service.d/override.conf && systemctl daemon-reload

# 下载 Xray-examples 的 nginx 与 xray 配置文件
curl -Lo /usr/local/etc/xray/config.json https://raw.githubusercontent.com/chika0801/Xray-examples/main/VLESS-Vision-TLS/config_server.json && curl -Lo /etc/nginx/nginx.conf https://raw.githubusercontent.com/chika0801/Xray-examples/main/VLESS-Vision-TLS/nginx.conf
配置 VLESS-Vision-REALITY Link to heading
使用他人域名 Link to heading
使用公开域名实际上并不需要申请证书;
修改 /usr/local/etc/xray/config.json,主要修改以下几处即可:
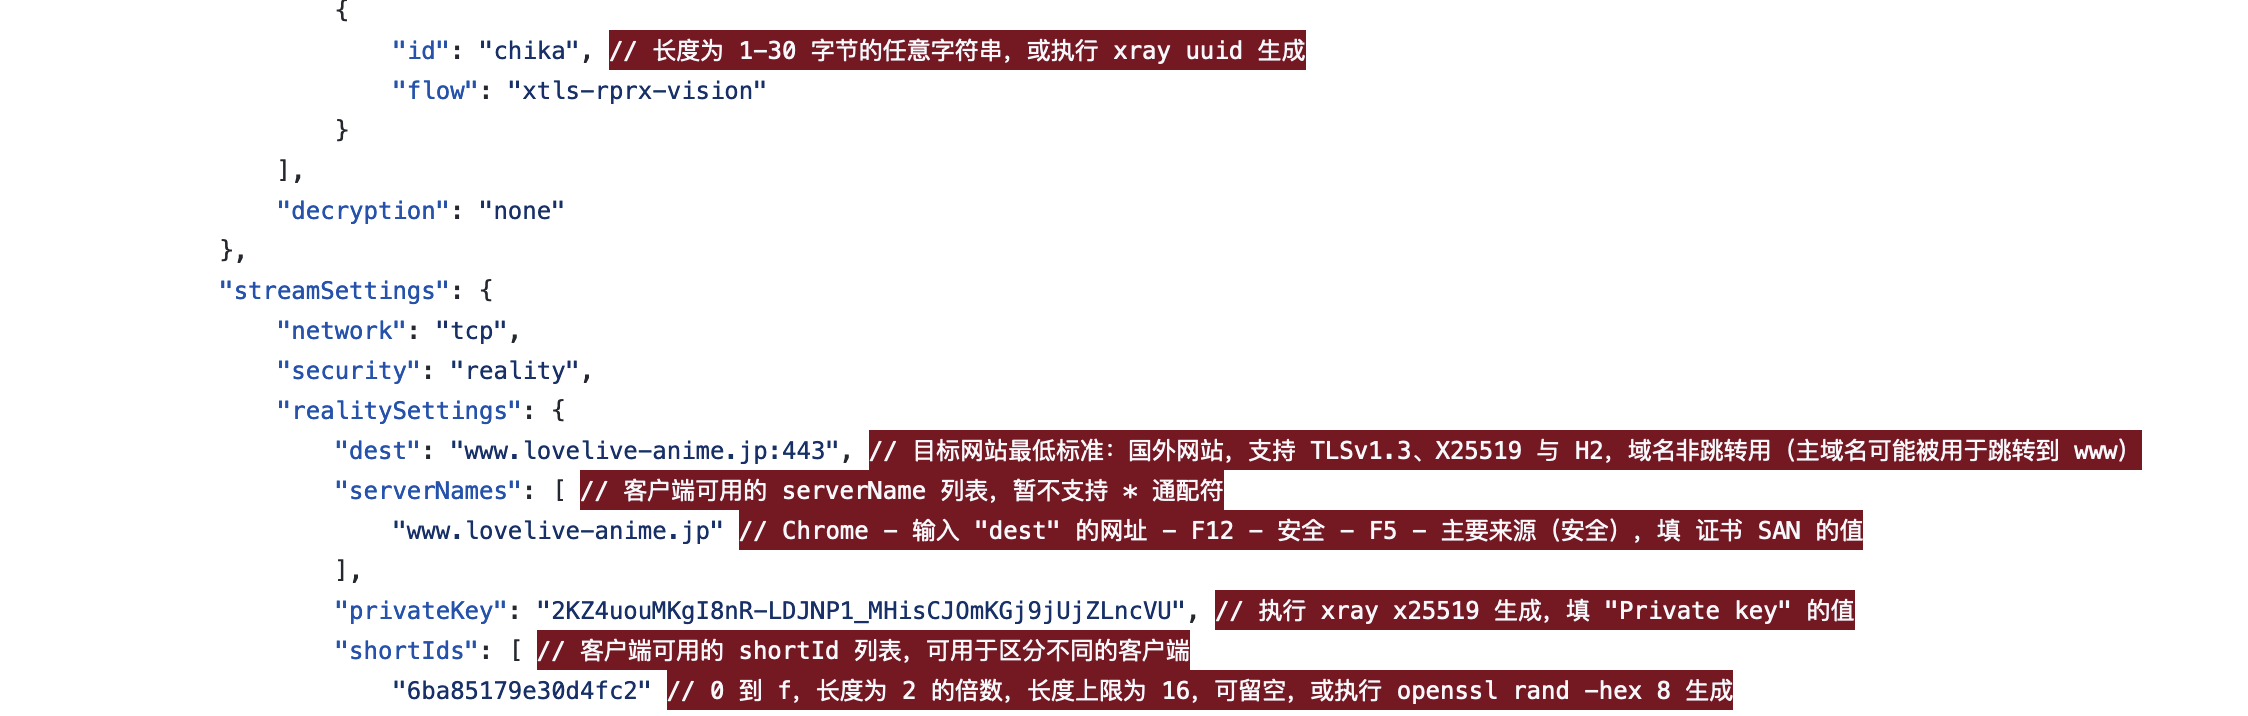
修改后的 config.json 如下:
{
    "log": {
        "loglevel": "warning"
    },
    "routing": {
        "domainStrategy": "IPIfNonMatch",
        "rules": [
            {
                "type": "field",
                "ip": [
                    "geoip:cn",
                    "geoip:private"
                ],
                "outboundTag": "block"
            }
        ]
    },
    "inbounds": [
        {
            "listen": "0.0.0.0",
            "port": 443,
            "protocol": "vless",
            "settings": {
                "clients": [
                    {
                        "id": "<generated by 'xray uuid'>",
                        "flow": "xtls-rprx-vision"
                    }
                ],
                "decryption": "none"
            },
            "streamSettings": {
                "network": "tcp",
                "security": "reality",
                "realitySettings": {
                    "dest": "www.tesla.com:443",
                    "serverNames": [
                        "tesla.com"
                    ],
                    "privateKey": "<generated by <'xray x25519'>",
                    "shortIds": [
                        "6ba85179e30d4fc2"
                    ]
                }
            },
            "sniffing": {
                "enabled": true,
                "destOverride": [
                    "http",
                    "tls",
                    "quic"
                ]
            }
        }
    ],
    "outbounds": [
        {
            "protocol": "freedom",
            "tag": "direct"
        },
        {
            "protocol": "blackhole",
            "tag": "block"
        }
    ]
}
VLESS-Vision-REALITY 所需要的域名,这里选择了
tesla.com。
VLESS-Vision-REALITY 所需域名需要满足以下条件:
- 可以直连的国外域名;
- 支持 TLSv1.3 X25519 与 h2,域名非跳转用;
检测方法,Edge 打开目标网站,使用 F12,找到 安全性 / Security 选项,如下图:
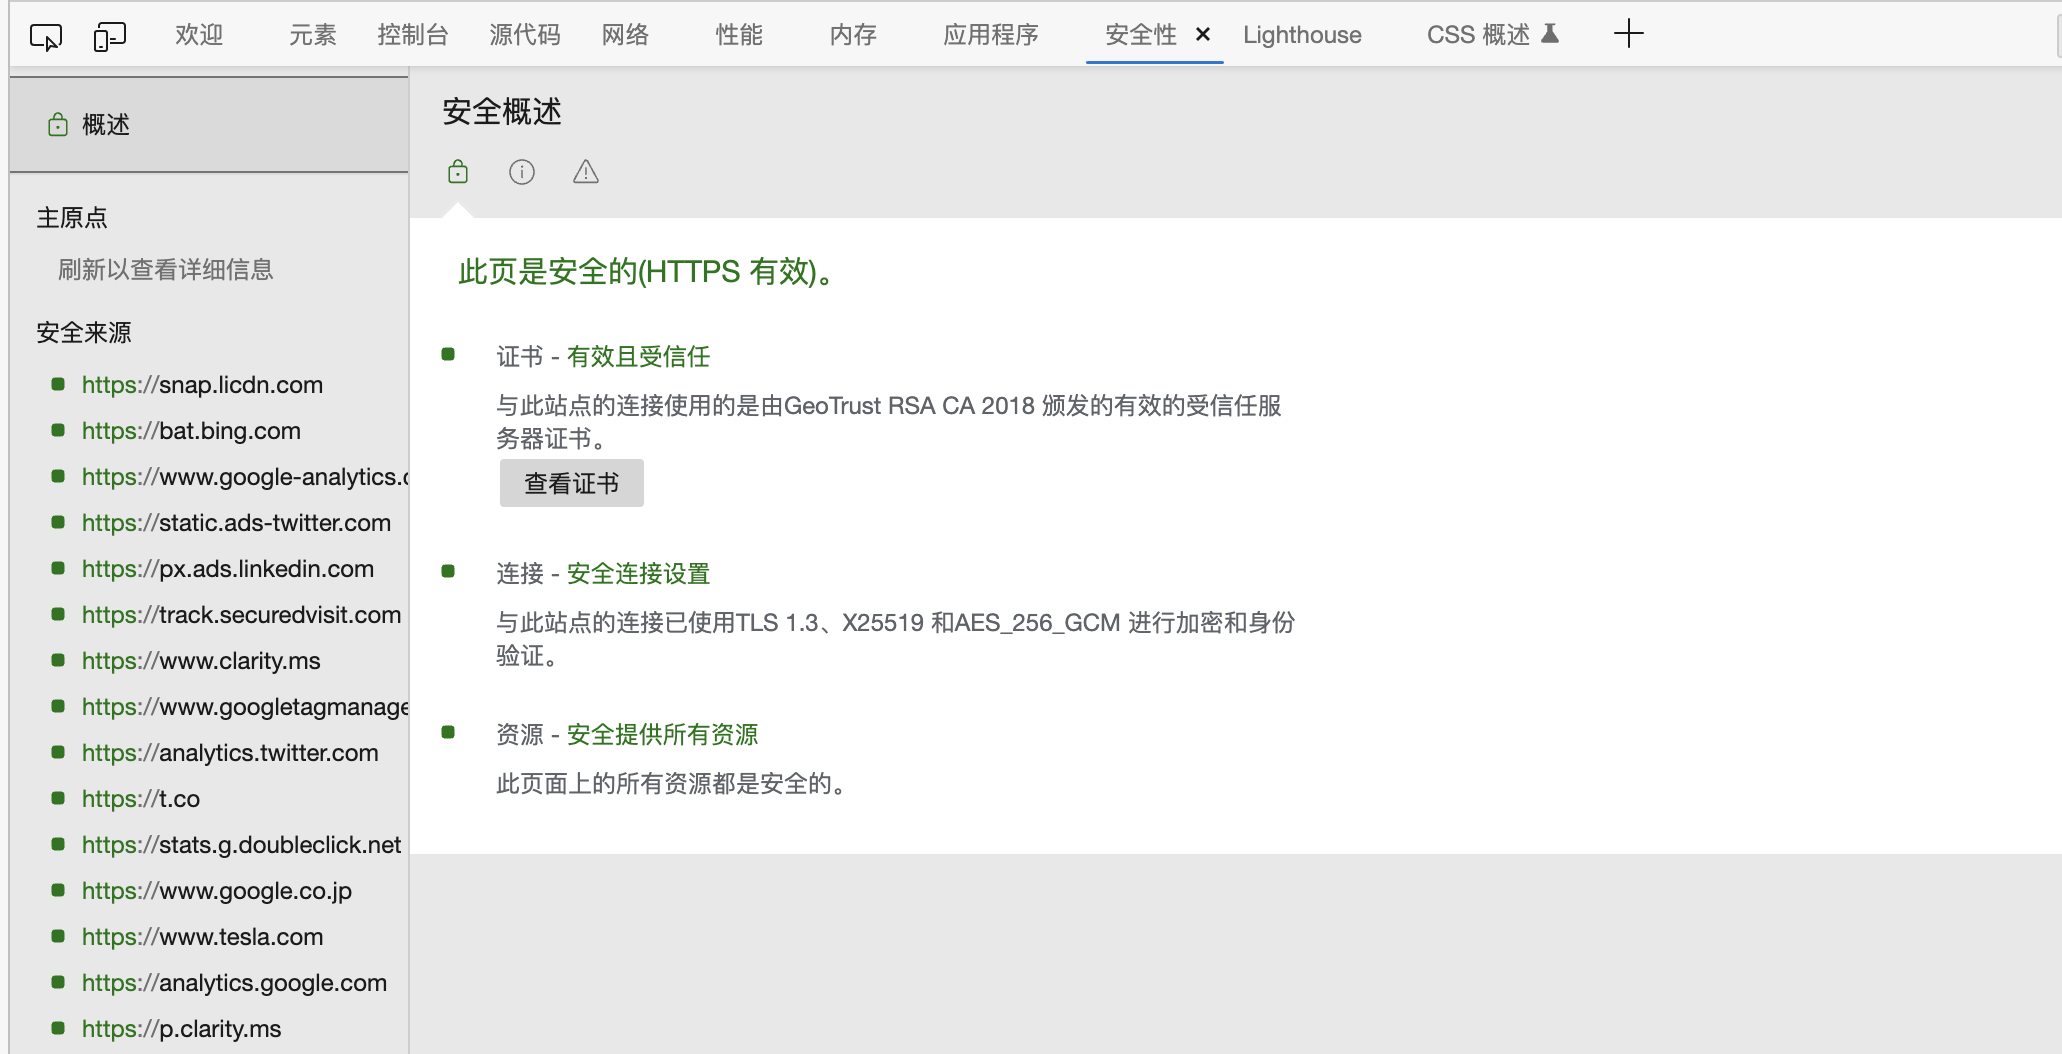
再点击 网络,名称那里的众多栏,需要 右键 -> 标题选项 使其显示 协议,如果对当前域名的请求协议是 h2,则支持 h2。
使用自己的域名 Link to heading
参考 Xray REALITY with ‘steal oneself’
暂时没啥必要;
基于 sing-box Link to heading
Shadowrocket 添加 VLESS 节点 Link to heading
| 名称 | 值 |
|---|---|
| 类型 | VLESS |
| 地址 | 服务端的 IP |
| 端口 | 443 |
| UUID | your_uuid |
| TLS | 选上 |
| XTLS | xtls-rprx-vision |
| 允许不安全 | 不选 |
| SNI | tesla.com |
| ALPN | 留空 |
| 公钥 | your_public_key |
| 短 ID | 6ba85179e30d4fc2 |
| 传输方式 | none |
| 多路复用 | 不选 |
| TCP 快速打开 | 不选 |
| UDP 转发 | 选上 |
| 代理通过 | 不选 |
注意,SNI 这一栏即 streamSettings 的 serverNames 所对应的项。
Clash.Meta 添加 VLESS 订阅 Link to heading
参见虚空终端。